Painting a Mallard Hen with Tommy Rogers
by Tommy Rogers
Tommy Rogers developed a booklet to help his students paint a typical marsh bird. Tommy gives step-by-step directions and shows the finished result. Tommy is an award-winning carver who looks forward to sharing his advice and techniques with other carvers.
IWCA is looking for experienced carvers willing to share their techniques and skills to help new carvers. If you'd like to help encourage new carvers by contributing to this growing collection of how-to articles, contact us
 |
|
Painting a perfect carving is always a daunting task for novice carvers. Locating feather groups, painting individual feathers and getting the correct feel and color of a live bird require extensive research and reference to real birds, photos, and taxidermy specimens.
In this project, Tommy Rogers uses a combination of techniques to help get that mallard looking just the way it should. He has his students practice on paper using a tea bottle for a body and has them paint first on a flat piece. Practice the basic steps before you add them to that perfect carving. You can contact Tommy with comments and questions here |
|
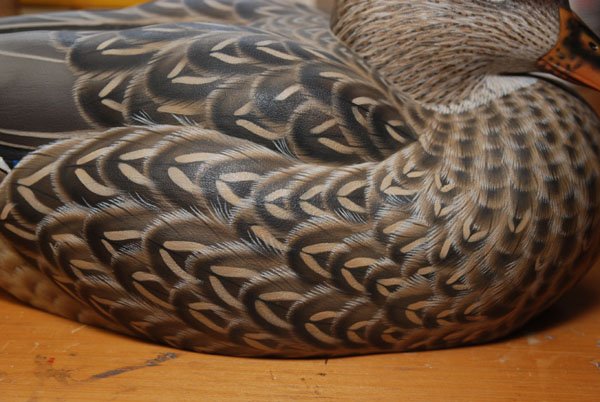
Mallard Hen Side Pocket |
|
 |
Step 1. Ghost-in feathers with a mix of warm white, taupe, and raw sienna. |
 |
Step 2. Paint in V-bars on the side pocket with the same mix from Step 1. |
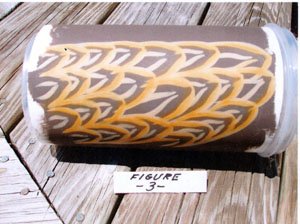 |
Step 3. Airbrush the inside portion of the outer band of each feather with raw sienna. |
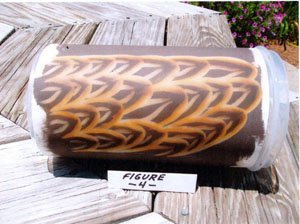 |
Step 4. Airbrush inside the raw sienna with burnt umber. |
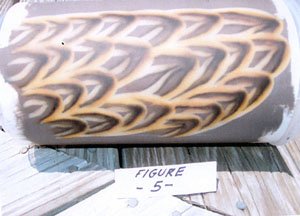 |
Step 5. Airbrush inside band with burnt umber plus a drop of black. |
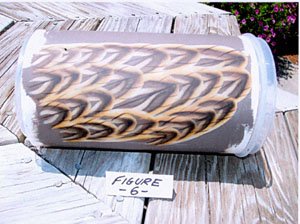 |
Step 6. Add feather shafts and major splits with burnt umber and black mix. |
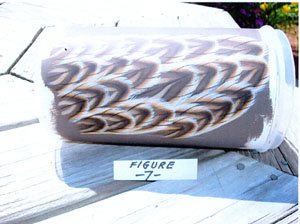 |
Step 7. Tip outer area of feather with original mix of warm white, taupe, and raw sienna. |
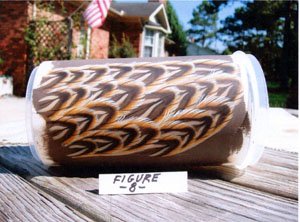 |
Step 8. Add additional splits with burnt umber and black mix. |
|
Mallard Hen Tertials, Primaries, and Speculum |
|
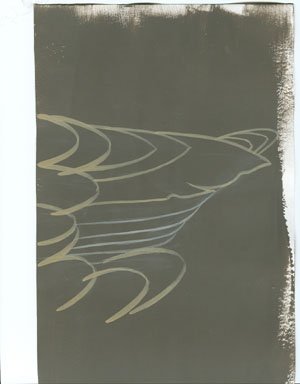 |
Step 9. Ghost-in feathers with a mix of taupe, raw sienna, and white. |
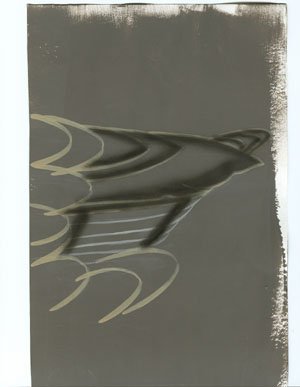 |
Step 10. Airbrush outer edge of tertials, primaries, and speculum with burnt umber and black. |
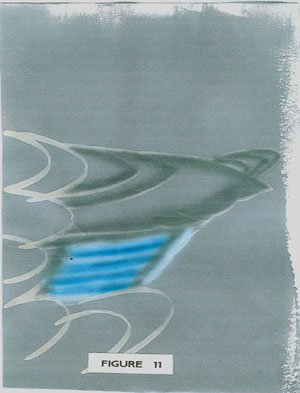 |
Step 11. Airbrush inside edge of speculum feathers and outer side with phthalo blue. Paint the trailing edge of these feathers with white. |
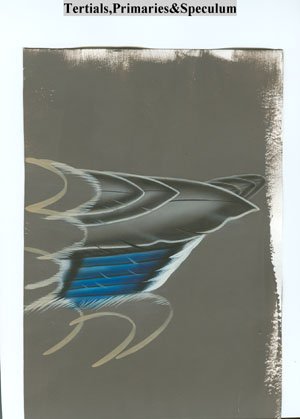 |
Step 12. Add highlights, splits. Airbrush inside of tertials and primaries with a mix of driftwood and white. |
|
Mallard Hen Breast |
|
 |
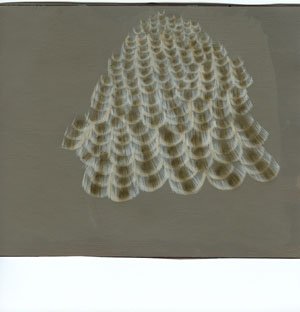
Step 13. Ghost-in feathers with a mix of taupe, raw sienna, and warm white. |
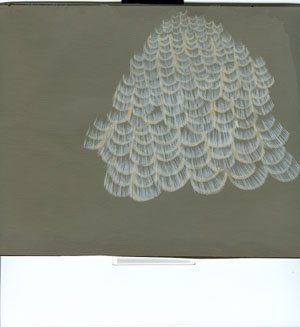 |
Step 14. Flick-in feathers with #3 Yarka with same edge mix lightened with white. |
 |
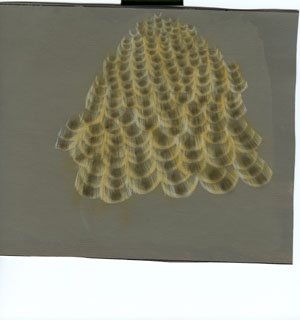
Step 15. Airbrush center of feather with burnt umber. |
 |
Step 16. Airbrush each side of brown center with raw sienna. |
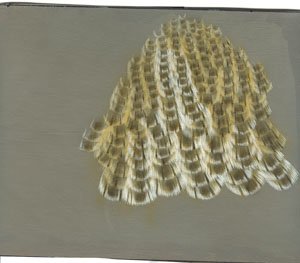 |
Step 17. Add splits with burnt umber and highlight feather edge with edge color and warm white. |
|
Mallard Hen Tail and Upper Tail Coverts |
|
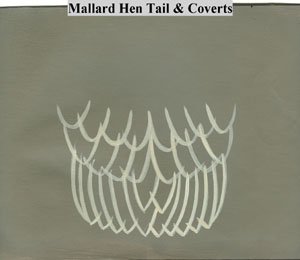 |
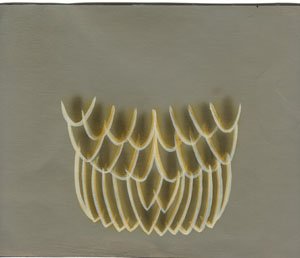
Step 18. Ghost-in feathers with mix of taupe, raw sienna, and warm white. |
 |
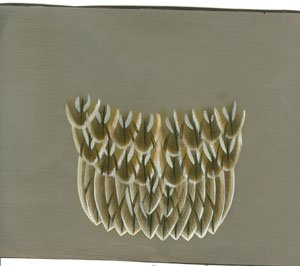
Step 19. Airbrush outer edge of each feather with raw sienna and inside of feather with burnt umber. |
 |
Step 20. Paint in V-bars with round brush and mix of taupe, raw sienna, and warm white. Add splits, shafts BU/BL. Highlight edges with warm white. |
|
Mallard Hen Head |
|
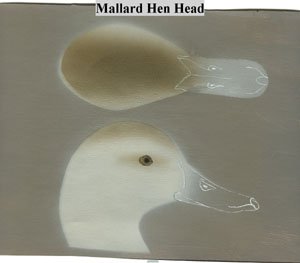 |
Step 21. Airbrush the head with a mix of warm white and taupe. Airbrush the crown and eye channel with burnt umber. |
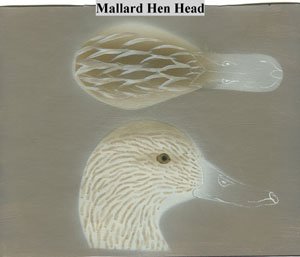 |
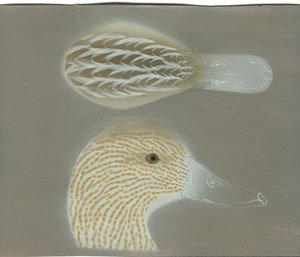
Step 22. Paint in feather tracks with driftwood. Tracks on crown appear as large feathers. |
 |
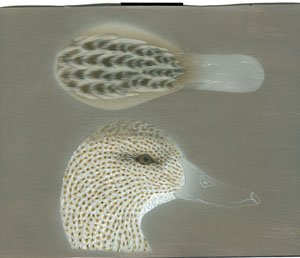
Step 23. Paint individual feathers on crown. Paint small dots on side of head in tracks with raw sienna. |
 |
Step 24. Paint feather tips on crown with taupe. Airbrush center of feathers on crown with sable. Ad highlights to side of head with warm white. |
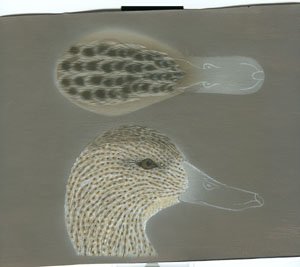 |
Step 25. Using watered-down driftwood, connect 3-4 feathers on the side of the head. This will create small tracks and flowing lines. Wash the lighter tracks randomly with raw sienna and white. |
